Showing posts with label Tea-time snacks. Show all posts

Monday, 10 September 2018

Paneer Tikka


Paneer tikka is a popular north-indian starter which is readily found in mostly all the restaurants. Being a big fan of all sort of vegetarian grilled food, it is one of my comfort food that I like to make quite often at home because of its hassle-free recipe. Moreover, the amount of oil or butter used during grilling can be easily controlled and the addition of cream by most of the restaurant chefs at the end of grilling the tikkas can be completely omitted, making it healthy. Check out step by step preparation of this delicious appetizer and do give it a try as it is simple and appealing yet filling dish at the same time.


Preparation time: 15 min.
Marination time: 2 hrs
Grilling time: 20 min.
Cuisine: North-indian
Type: Starter
Serves: 4-6

INGREDIENTS:
  • 500gms cottage cheese (paneer)
  • 1 cup bell peppers (capsicum-red, yellow, green) cut into 1" pieces
  • 1/2 cup onion (cut into 1'' pieces)
  • 1/4 cup tomatoes (deseeded and cut into 1'' pieces)-optional
  • 2 tbsp oil or melted butter (for brushing)
For Marination:
  • 1 cup hung curd
  • 1/2 tbsp kashmiri red chilli powder
  • 1/2 tbsp salt or to taste
  • 1/2 tbsp chaat masala
  • 1 tbsp ginger-garlic paste or crushed 
  • 1 tbsp kasoori methi (dry fenugreek leaves)
  • 1 tbsp lemon juice
METHOD:

  1. Cut cottage cheese, bell peppers, onions, tomatoes into 1'' pieces.                                                                                    
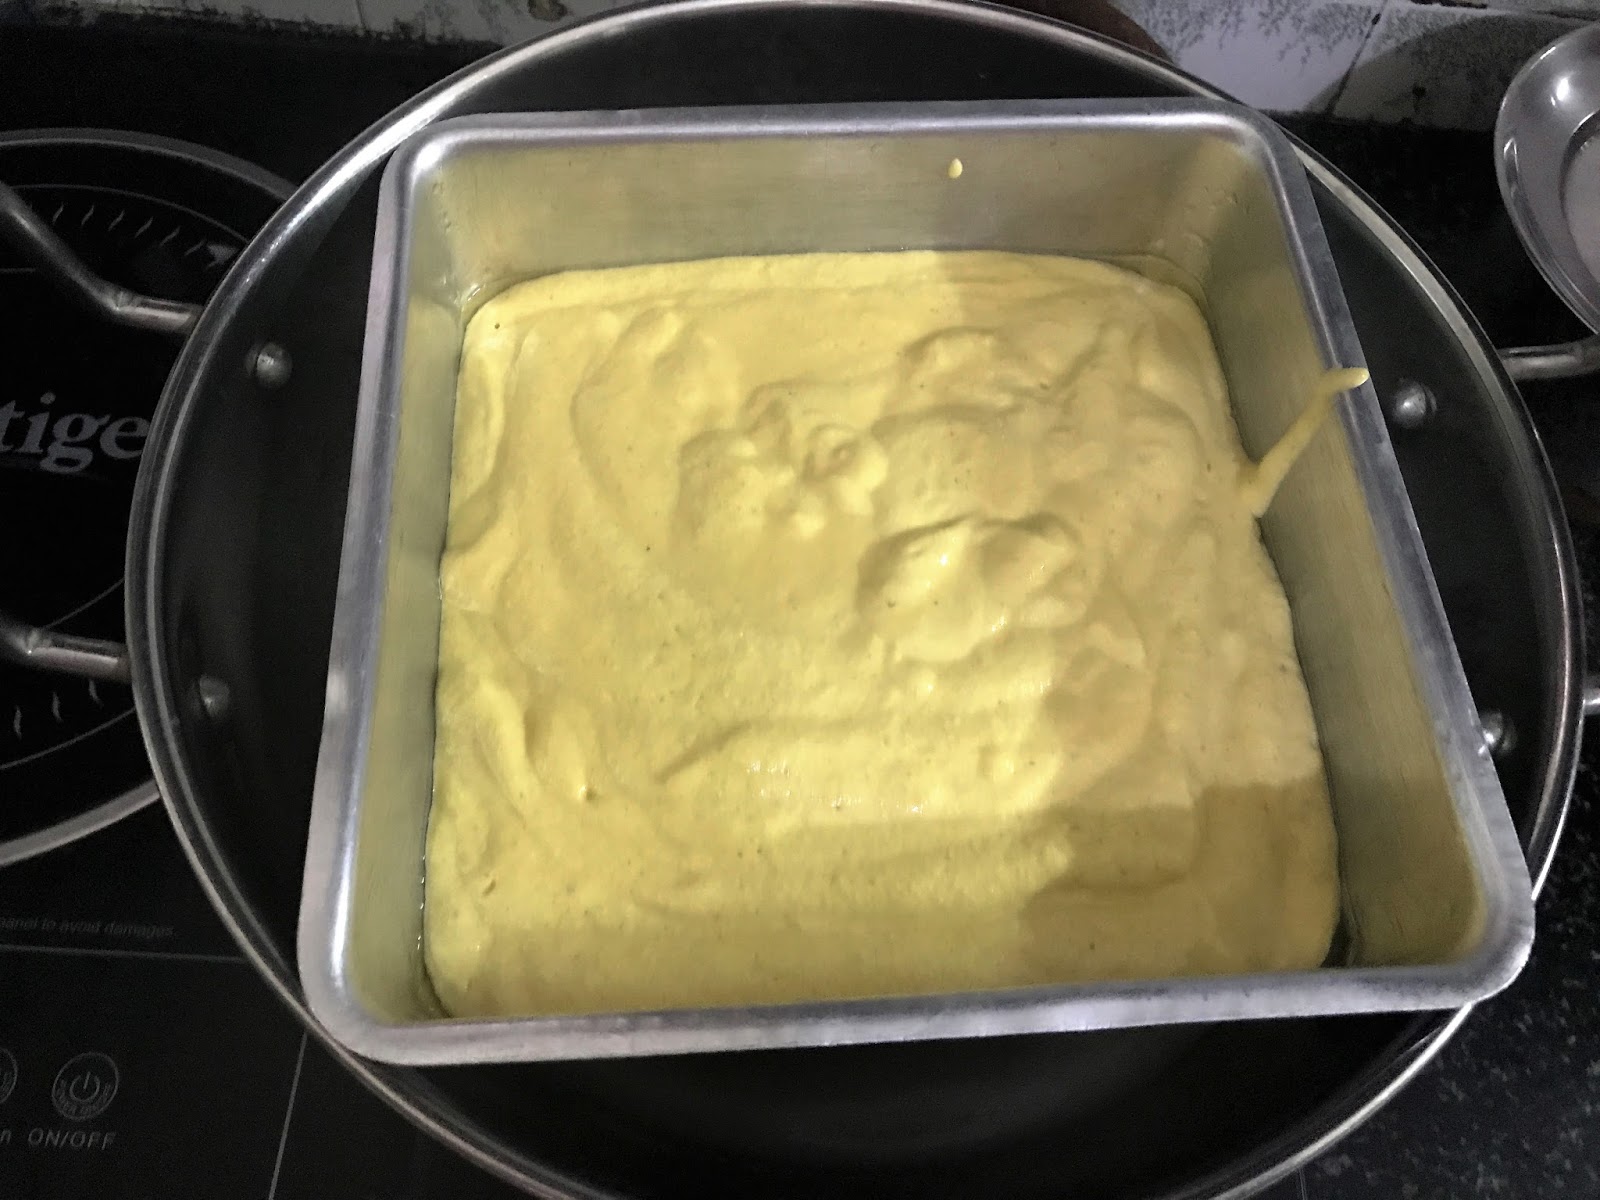
  2. Take 500 gms of yoghurt or curd in a sieve and keep refrigerated till all the water gets seperated and a cup of hung curd is left on the sieve.                                                                                                                
  3. In a bowl take all the ingredients of marination.                                                                                                                       
  4. Mix well using a whisk.                                                                                                                               
  5. Add all the pieces of paneer, bell peppers, onions etc. and mix gently in order to coat all the pieces well with the marination. Keep refrigerated for atleast 2 hrs. or overnight to get the best taste.                                                                                                                                                              
  6. If using wooden skewers, soak them in water for atleast an hour. No need to soak, if using metal ones.
  7. Pre-heat the oven at 200 degree celcius for atleast 15 min.
  8. Arrange the marinated pieces of paneer and vegetables on the skewers, keeping 3-4 paneer pieces on each skewer and vegetables in beween each paneer piece.                                                                                   
  9. Brush oil on the skewered tikkas and keep in the oven over wire rack.
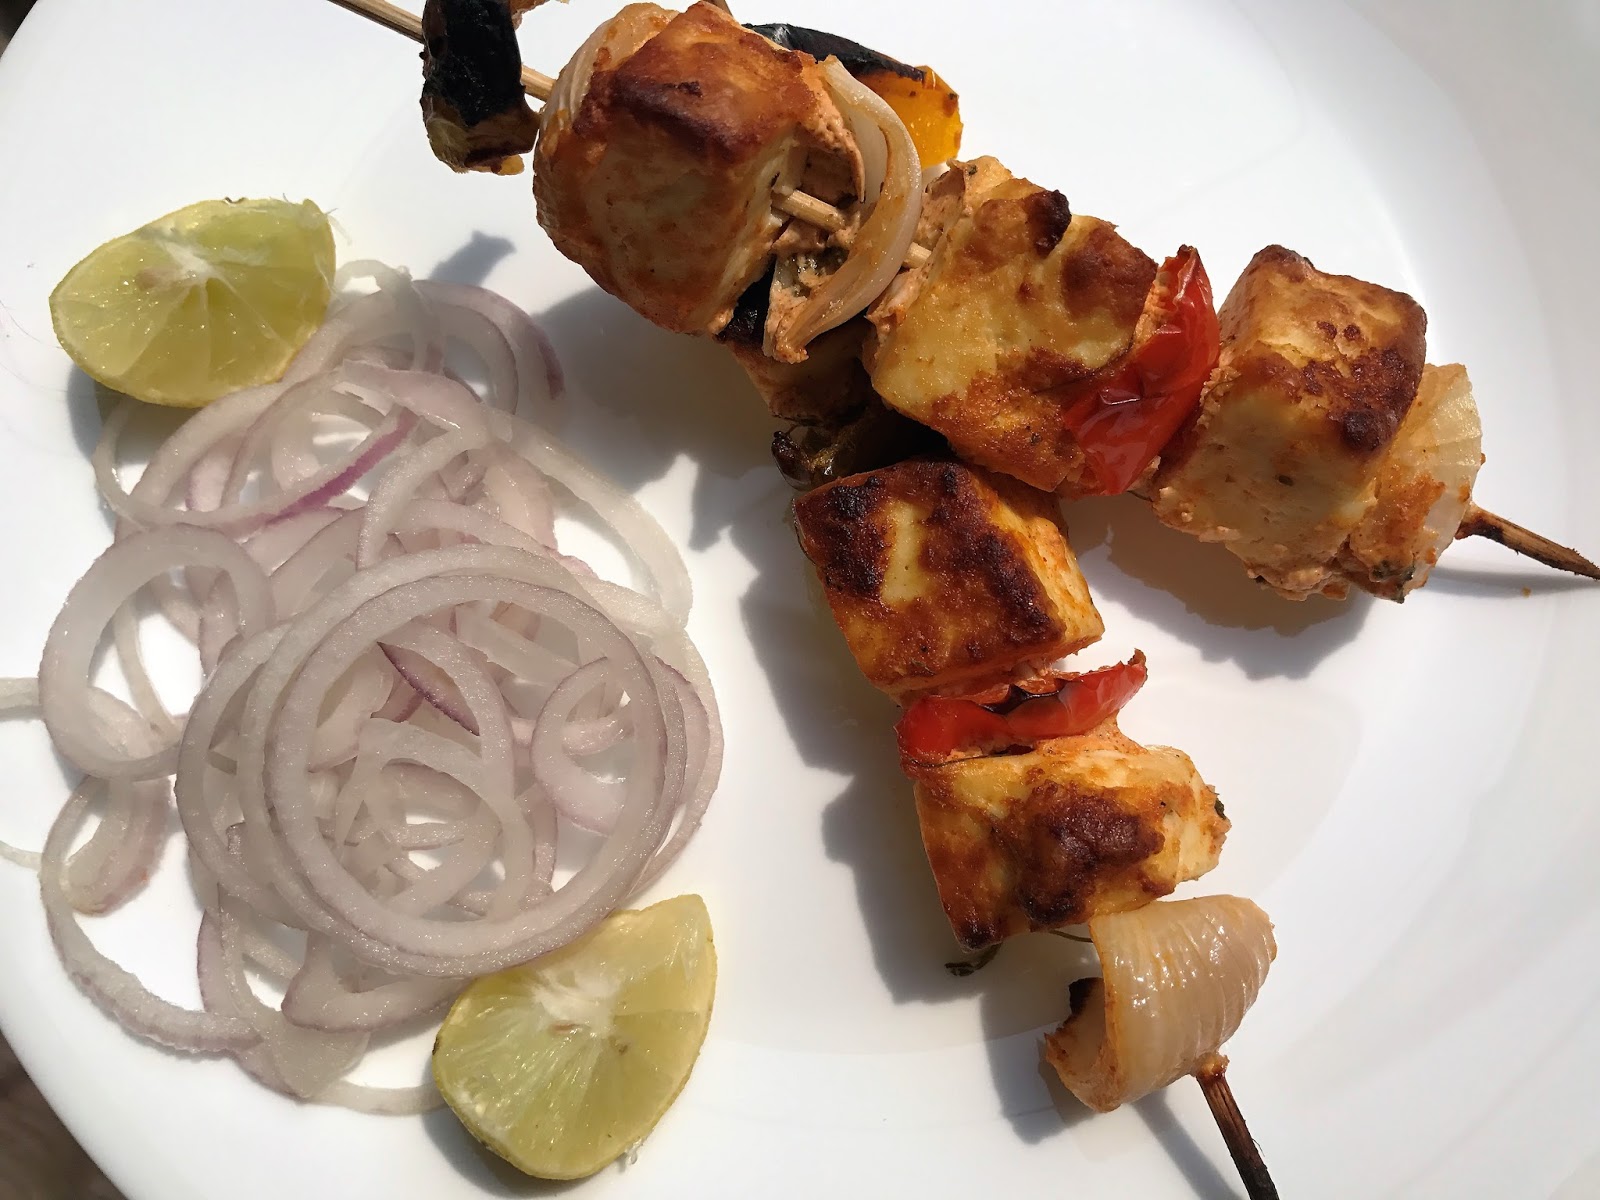
  10. Grill for 10 min. on each side, until slightly charred or grill marks appear on the tikkas.
  11. Serve hot with mint chutney, onions and lemon wedges.

Note:
  • The more you marinate the tikka, the more tastier and juicier it will be.
  • Mushrooms and broccoli can also be added in the veggie list. But do keep onions and green capscicum for extra crunch which after caramelizing give better taste to the buttery and juicy paneer tikka after grilling.

Dhokla


Dhokla is a famous gujarati snack which is not only healthy but mouth-melting as well. It is a steamed savoury sponge cake made using chickpea flour soaked in flavourful sweet and sour water infused with green chillies and curry leaves. I really enjoy it as an evening snack and sometimes in the breakfast also. Today, I am sharing the fool-proof recipe of dhokla which makes soft, spongy and juicy dhokla everytime I make it.


Preparation time: 5 min.
Steaming time: 20 min. + 10 min.
Type: Appetizer
Cuisine: Gujarati
Serves: 4-6

INGREDIENTS:

For Dhokla Batter:

  • 1 cup chickpea flour (besan)
  • 2 tbsp semolina (sooji/rava)
  • 1 cup curd 
  • 1 pinch turmeric powder
  • 1/4 tsp red chilli powder
  • 1 tsp ginger+green chilli paste
  • 1/2 tsp salt 
  • 2 tsp eno or fruit salt
  • water as required
For tempering:
  • 1 tbsp oil
  • 1 tbsp black mustard seeds
  • 5-6 green chillies (slit)
  • 8-10 curry leaves
  • 1 tbsp lemon juice
  • 2 tbsp sugar
  • 400ml water
For Garnish:
  • coriander leaves as required
  • coconut grated(optional)
METHOD:
  1. In a mixing bowl, add besan, sooji, curd, ginger+green chilli paste and mix well.

  2. Add salt, turmeric powder, red chilli powder and water to make a smooth batter.                                        
  3. Grease a pan using oil.                                                                                                                                                
  4. Heat around 500 ml of water in a kadai or pressure cooker.                                                                                                         
  5. Add eno to the batter and immediately pour the batter into the greased pan.  
                                                                             
  6. Steam on high flame for 15- 20 min. in a kadai or pressure cooker till a knife inserted comes out clean.    
                                                                                                                                                                                  
  7. Heat oil in a pan, add mustard seeds and let them splutter.
  8. Add green chillies and cook for few seconds.
  9. Next, add curry leaves and cook for 30 sec.
  10. Add water and let it boil. 
  11. Add sugar and cook for 10-12 min.      
                                                                                                                                                
  12. Finally, add lemon juice and remove from flame.
  13. Pour this flavourful boiled water on the steamed dhokla and let it rest for 30 min. until all the water gets absorbed by the dhokla.                                                                                                                                                 
  14. Garnish with coriander and coconut.                                                                                                                                              
  15. Enjoy hot or cool alongwith tamarind chutney or coriander-mint chutney.
Note:
  • In order to make a soft and spongy dhokla, the batter should be beaten well but don't overbeat after mixing eno, immediately pour in the pan and keep it for steaming.
  • Always use fresh packet of eno otherwise eno won't be effective enough and you won't get a fluffier dhokla.

Friday, 31 August 2018

Panchmeva Paag (Dry Fruits Burfi)


Panchmeva Paag is a Krishna Janmashtami as well as Ganesh Chaturthi special bhog or prasad. On the auspicious day of Krishna Janmashtami, we make this alongwith panchamrit as bhog for Ladoo Gopal ji. This is made with the mixture of 5 different types of nuts as the name suggests. Choice of nuts depends totally on personal liking and availability at home. I have used the ones that i find taste good in this. You can also make it during vrat or fast days.


INGREDIENTS:
  • 1.5 cups fox nut or lotus seeds (makhana)
  • 1.5 cups dry coconut, shredded
  • 1/2 cup melon seeds
  • 2 tbsp almonds
  • 2 tbsp chiraunji
  • 1 tsp green cardamom powder
  • 1/4 cups clarified butter (ghee)
For Sugar Syrup:
  • 1.5 cups sugar
  • 1 cup water
METHOD:
  1. First step is to roast all the nuts seperately, take a tbsp ghee in a heavy-bottomed pan and add the makhana. Roast for 4-5 min. on slow flame till light golden in colour and crisp while touching. Take it out on a plate.
  2. In the same pan, heat a tablespoon of ghee, add almonds and roast for a min. and take it out seperately.
  3. Similarly roast melon seeds, chiraunji and dry coconut.
  4. Crush the roasted almonds and fox nuts coarsely using a mortar and pestle.
  5. Mix together crushed almonds and fox nuts with roasted chiraunji, melon seeds and coconut.
  6. Add green cardamom powder and mix well.
  7. For the sugar syrup, heat a heavy-bottomed pan, add sugar and water. Bring it to a boil.
  8. Let it cook for 8-10 min. till one-string consistency.
  9. Finally add the above nuts mixture into the prepared sugar syrup. Mix well and cook for a min. on low flame.
  10. Take a greased thali or any square baking dish, and pour the mixture. 
  11. Let it cool for a few min. only and cut into desirable shapes.
NOTE:
  • This can be stored for a couple of weeks in an airtight container.
  • Make sure the sugar syrup is of one-string consistency before adding the nuts mixture in order to ensure perfect pieces.

Wednesday, 15 August 2018

Baked Samosa

Samosa is one of the most popular snack of north India. It is a triangular shaped crisp and flaky pastry filled with spicy and tangy potato filling. The list of choices available for the filling is endless. It can be served at small get togethers like high tea or kitty parties alongwith a hot cup of tea or coffee. These are generally deep-fried but today i made them baked brushing a very little amount of oil on these and they came out very crisp and flaky.
Shaping these samosas becomes a fun activity for my 8-year old daughter who is always keen to know what i am making and will always accompany me in the kitchen.
So, try these healthy yet delicious samosas and am sure you will not miss the deep fried ones.

Ingredients:
For the pastry cover (dough)
  • all-purpose flour (maida)
  • 1/2 tsp salt
  • 1/2 tsp carom seeds (ajwain)
  • clarified butter or ghee
  • water as required
For the filling:
  • 6-7 potatoes (boiled and peeled)
  • 1/2 cup green peas
  • 1-2 green chillies
  • 1/2 cup green peas
  • 1 tsp cumin seeds
  • 1 tbsp coriander powder
  • 1 tsp mango powder
  • 1 tsp rock salt
  • salt to taste
  • coriander leaves chopped
  • 10-12 raisins
  • 10-12 cashew nuts
  • 1 tbsp oil
  • oil for deep frying
METHOD:

  1. Firstly, mix the ingredients of the covering and make a hard dough. Cover and let it rest for 30 min. 
  2. Heat oil in a pan, add cumin seeds and let it splutter. Add green peas and green chillies and cook for few min. add roughly mashed potatoes, raisins and cashewnuts and all the spices. Mix well. 
  3. Divide the dough into lemon sized balls and roll out a thin roti. Cut the roti in two halves. now take one semicircle and make a cone, place a tablespoon of filling in the centre and apply little water to seal the open edges carefully and give the shape of a samosa.
  4. Lightly brush all the samosas with very little oil and bake for 30-35 min. in a preheated oven at 200 degree celcius.
  5. Serve hot with the coriander chutney or tomato ketchup.
Note:
  • Do not over knead the dough of samosas else they will not be flaky and crisp.
  • You may deep-fry these samosas instead of baking.

Sunday, 22 July 2018

Arbi ke patte ke patode /Colocassia leaf rolls


 Monsoon arrives and so is the desire to have something crispy and healthy to snack on during evenings enjoying with a hot cup of tea. Colocassia leaves are available during this season only and these are rich in iron. Today i got some leaves from the market and luckily it started pouring outside... ofcourse i had a big reason to make them immediately. These rolls are known by various names in different places.. patra in gujarat.. alu wadi in maharashtra.. arbi ke patte ke patode in north india which is my native place.. hence the title remains the same.


Preparation time: 10 min.
Cooking time: 20 min.
Type: Tea-time snack
Cuisine: North-indian
Serves: 5-6

INGREDIENTS:

  • 10-12 colocassia leaves
  • oil for frying
For batter:
  • 2 cups gram flour
  • 1/4 tsp turmeric powder
  • 1/2 tsp red chilli powder
  • 1 tbsp coriander powder
  • salt to taste
  • 2 tbsp lemon juice
  • Water as required
METHOD:
  1. Wash colocassia leaves thoroughly under running water and pat them dry.
  2. To make batter, in a bowl add gram flour, turmeric powder. red chilli powder, coriander powder, salt and lemon juice.
  3. Mix them well and make sure the batter is of dropping consistency neither too thick nor thin.
  4. Place bigger leaf on a flat surface keeping the darker side down.
  5. Spread the batter on the leaf generously using a spoon or hands.
  6. Place another leaf on top of it and spread the batter again.
  7. Repeat this process with 5-6 leaves depending upon their size keeping the smaller inside.
  8. Now start rolling the leaves from one end and make a roll.
  9. Repeat the process with other leaves to make another roll.
  10. Steam the rolls for 15 min. on high heat till a knife inserted comes out clean.
  11. Let the rolls cool down completely and then cut 1/2" thick slices.
  12. Deep fry the slices in hot oil for 1-2 min. till golden on both sides.
  13. Serve hot with coriander chutney or tomato ketchup.
Note:
  • Once steamed, the rolls can be stored in the refrigerator for later use.
  • Number of leaves to make a roll can be increased or decreased depending upon the thickness of roll you like.

Wednesday, 4 July 2018

Eggless Chocolate Cupcakes


The other day my daughter who has a serious sweet tooth and wants something sweet now and then...asked me to make chocolate cupcakes at night.. as i generally avoid stocking up on eggs in summer, i looked for this recipe for chocolate cupcakes without eggs in an old magazine and made her happy in no time.
After eating this you will not complain about missing eggs because these are super moist and spongy and addition of coffee enhances the flavor and richness of chocolate to a new standard. Do try these quick and easy cupcakes or follow the same recipe to bake a cake.


Preparation time: 10 min.
Baking time: 20 min.
Makes: 12 cupcakes


Ingredients:
  • 1.5 cups all-purpose flour (maida)
  • 1/4 cup cocoa powder (unsweetened)
  • 1 cup sugar (granulated)
  • 1 tsp baking soda
  • 1/2 tsp salt
  • 1 cup warm water
  • 1.5 tsp instant coffee powder
  • 1 tbsp white vinegar
  • 1 tsp vanilla essence
  • 6 tbsp oil
Method:
  1. Pre-heat oven to 180 degree celcius for 10-15 min. 
  2. Place liners in the muffin/cupcake pan or lightly grease with oil.
  3. Sift together all-purpose flour, cocoa powder, baking soda and salt.
  4. Add sugar in the dry ingredients and mix well using a whisk.
  5. Add coffee powder to warm water and mix well.
  6. Add vinegar, vanilla essence and oil in the brewed coffee.
  7. Pour wet ingredients into the dry ingredients and make a lump-free batter.
  8. Fill the lined cupcake pan till 2/3rd full and bake for 20 min. till a tooth-pick inserted comes out clean.
  9. Let these cool on a wire rack and enjoy with a drizzle of chocolate sauce.

Sunday, 10 June 2018

Jam Thumbprint Butter Cookies


Try these butter cookies with the goodness of your favourite jam in the centre making them kids favourite snack. Indulge your kids while making them and they will love to do the filling part.

INGREDIENTS:
  • 1 and 3/4 cups all-purpose flour
  • 1/2 tsp baking powder
  • 1/4 tsp salt
  • 125 gm soft butter
  • 125 gm sugar 
  • 1 egg
  • 1 tsp vanilla essence
  • strawberry jam as required

METHOD:

  1. Preheat oven at 180 degree celcius.
  2. Line a baking sheet with butter paper.
  3. Sift together maida, baking powder and salt.
  4. Beat together butter and sugar for 5 min. well till fluffy add 1 egg and vanilla essence beat well.
  5. Gradually mix in dry ingredients till resembles bread crumbs and stop the beater.
  6. Gently mix to make dough.
  7. Scoop out 1 inch balls using cookie scooper on the lined baking sheet.
  8. Press a thumb print into the centre of each cookie about half inch deep.
  9. Fill each centre with 1/2 tsp jam using spoon or piping bag.
  10. Bake at 180 degree celcius for 12-15 min or until edges turn golden in color.
  11. Let these cool on a wire rack and serve.

Saturday, 2 June 2018

Mushroom Quiche


Quiche is a classic french dish with an open pie crust filled with egg and cheese custard along with cooked vegetables or chicken. It can be eaten hot or cold, during breakfast, lunch or dinner depending upon personal taste or preferences.
This is the first time i made a quiche and it came out so well and was liked by all.. the crust came out so flaky and the mushrooms and cheese combination was worth a try.


INGREDIENTS:

For the pastry crust:

  • 1 cup all-purpose flour
  • 75 gm butter (chilled)
  • 1/8 tsp salt
  • 3-4 drops vinegar or lemon juice
  • 2-3 tbsp chilled water
For the filling:

  • 2 cups mushroom (chopped)
  • 1/2 tsp garlic (crushed)
  • 1 tbsp lemon juice
  • 2 eggs
  • 3/4 cup fresh cream
  • 1/2 black pepper
  • salt to taste
  • 2 tbsp parsley or fresh coriander
  • 100 gms mozzarella or cheddar cheese (grated)
METHOD:
For the pastry crust:
  1. Mix together all-purpose flour, salt and butter using finger tips.
  2. Add vinegar or lemon juice and mix gently.
  3. Do not knead the dough, lightly bring together using chilled water.
  4. Cover with cling film and refrigerate for atleast 30 min.
  5. Roll out the dough and transfer to the pie mould.
  6. Gently cover all the edges completely and trim the extra edges.
  7. Lightly prick using a fork.
  8. Blind bake for 10-15 min. at 180 degree celcius.
For the filling:
  1. Heat olive oil and add garlic, stir for few sec.
  2. Next, add mushrooms and cook till light golden in colour.
  3. Add lemon juice and remove from flame.
  4. In a bowl, beat eggs and cream together.
  5. Add salt, pepper and parsley, mix well.
  6. Add cooked mushrooms into the egg mixture.
  7. Put about 2 tablespoons of filling on the base of the baked crust.
  8. Pour the filling over the cheese and top with some more cheese.
  9. Bake in a preheated oven at 200 degree celcius till cheese melts and the crust gets nice golden brown in colour.

Saturday, 5 May 2018

Cheesy Methi Balls


This is my variation to the classic gujarati snack "Methi Muthia" . Here i have stuffed the prepared methi dough with a cube of cheese and it tastes delicious and even kids enjoy the healthy fenugreek leaves without any complaint.

Preparation time: 15 min.
Cooking time: 10 min.
Type: Appetizer

Serves: 4


Ingredients:


For covering:


  • 150 gms fresh fenugreek leaves (methi)
  • 1 cup chickpea flour (besan)
  • 1/4 tsp asafoetida (hing)
  • 1/4 tsp turmeric powder
  • 1 tsp red chilli powder
  • 1 tsp salt
  • 3 tsp oil
  • 1/2 cup water


For stuffing:


1/4 cup mozzarella cheese (cut in 1/4" cubes)


Method:


  1. Heat oil in a pan, add hing, turmeric powder, red chilli powder.
  2. Immediately add chopped fenugreek leaves, cover and cook a little.
  3. Add salt and water. cook till methi is cooked.
  4. Add besan and keep stirring till a dough like consistency is formed.
  5. Keep aside to cool.
  6. Divide the mixture in lemon-sized balls.
  7. Place one cheese cube inside each ball and cover with the dough to make smooth round balls.
  8. Deep fry till golden brown.
  9. Serve hot with tomato ketchup or green chutney.


Saturday, 14 April 2018

Stuffed Khandvi


Khandvi is a popular gujarati delicacy that involves a lot of practise and patience to get those perfect spirals. It is made using gram flour and yoghurt and flavoured with the tempering of pungent mustard, sesame seeds and curry leaves. Today i am sharing a recipe for stuffed khandvi with fresh coconut and coriander filling.

Preparation time: 5 min.
Cooking time: 10-12 min.
Type: Snack
Cuisine: Gujarati
Serves: 2-3

INGREDIENTS:

For batter:
  • 1/2 cup gram flour (besan)
  • 1/2 cup yoghurt
  • 2 cups water
  • 1 green chilli (crushed)
  • 1" ginger (crushed)
  • 1 pinch asafoetida
  • 1/8 tsp turmeric powder
  • salt to taste
For filling:
  • 1 tbsp fresh coconut (grated)
  • 1 tbsp fresh coriander (chopped)
For tempering:
  • 1/2 tsp mustard seeds
  • 1/2 tsp sesame seeds
  • 6-8 curry leaves
  • 1 tbsp oil
For garnish:
  • 1 tbsp fresh coconut (grated)
  • 1 tbsp fresh coriander (chopped)
METHOD:
  1. Mix all the ingredients of the batter and mix well using a whisk making sure no lumps are formed.
  2. Heat a non-stick pan, add the batter and cook on low flame stirring continuously.
  3. Continue cooking for 10-12 min. till the batter gets thickened and starts to leave the sides of the pan.
  4. Quickly spread the mixture evenly on the back of a greased thali or aluminium foil using a rubber spatula. Spread as thinly as possible.
  5. Let it cool completely for 10-12 min. and spread coconut and chopped coriander evenly.
  6. Cut into 2" wide strips and start rolling from the edges gently.
  7. Make all the rolls and keep on a plate.
  8. To prepare tempering, heat oil and add mustard seeds, sesame seeds and finally curry leaves.
  9. Pour the prepared tadka on the khandvi rolls evenly using spoon.
  10. Garnish with coconut and coriander leaves and enjoy after refrigerating for few min.
NOTE:
  • If the batter is not cooked properly, it will be sticky and you will not be able to make rolls.
  • If the batter is overcooked, it will be thick and you will not be able to spread properly.
  • Spread the batter as quickly as possible when its hot else it will get thicker and you will not be able to spread the batter.
  • It can be stored for 1-2 day in fridge.

Sunday, 4 March 2018

Dahi Vada/ Dahi Bhalla


Dahi vada or dahi bhalla is a famous north-indian snack which is made generally during the time of festivals. These are fried or non-fried lentil fritters which are dipped in creamy yoghurt alongwith few condiments. These can be made in a variety of ways, either with udad dal or moong dal or a combination of both in variable quantity.

INGREDIENTS:

For vadas:
  • 3/4 cup udad dal (soaked for 4-5 hrs)
  • 1/4 cup moong dal (soaked for 4-5 hrs)
  • 1 tbsp ginger+green chilli paste
  • a pinch of baking soda
  • oil for deep frying
For spiced yoghurt:
  • 3cup yoghurt
  • 1.5 tbsp sugar (powdered)
  • 1 tsp cumin powder
  • 1 tsp chaat masala
  • a pinch of red chilli powder
  • saunth chutney as required
  • coriander chutney as required
  • few coriander leaves for garnish
  • a pinch of hing (asafoetida)
  • salt to taste
  • water as required
METHOD:

  1. Drain the soaking water completely and transfer the soaked dal into a grinder of a food processor.
  2. Add rest of the ingredients for Vada except for baking soda. Add up to ¾ cup of water (slowly add more if needed). Grind it into a thick smooth paste. Transfer the lentil paste into a medium sized mixing bowl. 
  3. Add baking soda and now using your hand or a whisk, whisk the paste vigorously rotating your hand in a circular motion in one direction. This helps making the paste light.
  4. Heat oil in a deep fryer. Drop a dollop of Urad Dal paste (about the size of a small lemon) on your palm. Shape it into a circle. 
  5. Carefully slide the vada into the deep fryer. Fry until its golden brown in color. 
  6. Before serving let the fried vada soak in water for 3-5 minutes. Then lift it in one hand and give it a light squeeze with the other squeezing excess absorbed water out. Place them on a serving dish.
  7. For spiced yogurt (or dahi) – Mix all the ingredients together in a big mixing bowl. 
  8. Pour as much spiced yogurt as you like over the vadas. Garnish with cilantro and serve.


NOTE:
  • Add as little water for grinding as possible, enough for the bladed to run smoothly.

Friday, 2 March 2018

Mawa Gujiya /Khoya Gujiya


HAPPY HOLI TO ALL THE FOODIES!!

Gujiya is a famous holi snack of north India. I always prefer homemade gujiyas rather than buying sugar syrup dripping, high in saturated fats ones. These can be made both sweet or savoury and the list of stuffing is endless, experiment and you will come up with so many options. Every home has its own recipe of making gujiya, I always liked gujiya made by my mom so today I am sharing her mawa gujiya recipe stuffed with khoya, shredded coconut and dry fruits.

Preparation time: 20 min.
Cooking time 1 hr.
Type: Snack

Ingredients:

For the cover:
  • 4 cups all-purpose flour (maida)
  • 3 tbsp oil/ghee (melted)
  • 1 cup water
For the filling:
  • 250 gm khoya or mava
  • 1/2 tsp green cardamom powder
  • 1/8 tsp nutmeg powder
  • 1 cup dry coconut (shredded)
  • 1 tbsp raisins
  • 1 tbsp chironji
  • 1 tbsp melon seeds
  • 1 cup castor sugar
Method:

For the filling:
  1. In a pan, heat khoya till light golden in colour.
  2. Add cardamom powder, nutmeg powder, shredded coconut, raisins, chironji melon seeds and castor sugar.
For the cover:
  1. Sieve all-purpose flour in a bowl.
  2. Mix melted clarified butter or ghee using fingers until the mixture resembles bread crumbs and binds to a certain extent.
  3. Now add some water and knead lightly to form a stiff dough.
  4. Cover and leave the dough for 30 min. atleast.
Preparing and assembling the gujiya:
  1. Divide the dough into equal-sized portions and make them into balls. 
  2. Roll the balls into circles about 4 inch diameter.
  3. Place the rolled puri on the gujiya mould, fill with a spoonful of the stuffing in the centre. Dip your finger into water and apply all around the edges. Now close the mould ensuring the filling does not spill out of the edges. Press lightly and remove the extra dough to give it the shape of the mould.
  4. Heat oil in a pan and deep fry the gujiyas on medium flame till crisp and golden in colour.
Note:
  • During the entire process of making gujiya, keep the dough and prepared gujiyas covered with a muslin cloth to prevent them from drying out.

Saturday, 10 February 2018

Dahi Kebab - Mughlai Appetizer


Dahi kebab is a very soft textured, mouth-melting appetizer of mughlai cuisine. These are mild in taste and served with a spicy dip alongwith onion rings like any other kebab dish. I tend to use only limited spices to ensure the unique flavour and sweetness of my favourite hung curd. I generally tie the fresh curd in a muslin cloth and place it over a sieve lying on the rims of a large bowl to collect the strained water overnight in the refrigerator. During summers avoid hanging the curd outside as little sourness can spoil the flavour of this rich and cremy royal appetizer.


Preparation time: overnight
Cooking time: 15 min.
Type: Appetizer
Cuisine: Mughlai
Serves: 2-3

Ingredients:

3/4 cup hung curd (made from 500 gm curd)
3 tblsp cottage cheese (grated)
3 tblsp roasted gram powder
1 tblsp onion (sliced and fried till golden-brown)
1 tblsp mint leaves (chopped)
1 tblsp coriander leaves (chopped)
1 tsp green chillies (chopped)
1/2 tsp chaat masala
1/4 tsp green cardamom powder
salt to taste

For filling:
50 gm khoya
1/2 tsp sugar
10-12 strands saffron
1 tblsp cashewnuts (chopped)
1 tblsp raisins

Method:

For filling:

  1. Heat a pan, add khoya and cook till little soft.
  2. Add sugar and saffron and mix well.
  3. Remove from flame and add nuts and raisins.
  4. Let it cool and make 6 small balls.
For Kebabs:
  1. In a bowl mix all the ingredients and refrigerate for few min.
  2. Divide the mixture into six parts using a spoon.
  3. Dust your hands with little roasted gram flour and pat the curd mixture to flatten and stuff with a ball of the above filling and seal all over to give the shape of round kebabs.
  4. In a pan heat enough oil or ghee, shallow fry the kebabs on both the sides till a nice golden-brown crust forms.
  5. Serve hot with your choice of spicy dip.
Note:
  • These kebabs are very delicate so handle them gently.
  • Hung curd should be absolutely dry, else pat it dry on a muslin cloth.
  • Roasted gram flour can be dusted before shallow frying the kebabs if the mixture is too wet to handle.

Saturday, 20 January 2018

Potato Cheese Balls - Kid's Delight


This is an absolute kid's favourite snack recipe with very minimal ingredients required and are really quick to make. Kids will love the surprise with gooey and creamy centre stuffed with cheese. You can roll out the balls in large quantity and freeze the remaining balls, the next time your kids demand these, you only need to deep fry them and enjoy the cheesy munchies.

Preparation time: 20 min.
Cooking time: 15 min.
Type: Tea-time snack


Ingredients:

  • 1 kg potatoes (boiled and peeled)
  • 1 cup spring onion (chopped)
  • 1/2 cup fresh coriander (chopped)
  • 1 tsp black pepper powder
  • salt to taste
  • 1/2" cheddar cheese cubes as required
  • 2 tblsp corn flour
  • 1 cup dry bread crumbs
Method:
  1. Grate the potatoes and add spring onion, coriander leaves, salt and pepper.
  2. Divide the potato mixture into equal sized portions.
  3. Flatten each portion and place one cheese cube inside and make all balls likewise.
  4. Make a thin slurry using cornflour and water.
  5. Dip each ball in the slurry to completely coat the balls.
  6. Finally coat with bread crumbs and press lightly to avoid crumbs coming out while deep frying.
  7. Deep fry the balls in hot oil.
  8. Serve hot with tomato ketchup.

Friday, 5 January 2018

Banana Walnut Bread - Quick Bread Recipe


This is a simple and fool-proof recipe of delicious, moist and homemade banana bread which involves only mixing together of all the ingredients. Even a non-baker can bake this without going wrong. And you know what... it is the best way to use the most overripe black and mushy bananas that you might be planning to throw in the bin.. which will give you the super moist banana bread.

Preparation time: 5 min.
Cooking time: 40 min.
Type: Quick Bread
Serves: 4-5

Ingredients:

  • 2 cups all-purpose flour
  • 1 cup castor sugar
  • 1 1/2 tsp baking soda
  • 1/2 tsp baking powder
  • 1 tsp salt
  • 1/4 tsp cinnamon powder
  • 2 eggs
  • 1 tsp vanilla essence
  • 1/2 cup oil
  • 1/2 cup yoghurt
  • 1/2 cup milk
  • 3-4 banana
  • 1/2 cup walnut (chopped)
Method:
  1. Pre-heat oven at 200 degree celcius for 10-15 min.
  2. Sift together all-purpose flour, sugar, baking soda, baking powder, salt and cinnamon powder in a large bowl.
  3. Mash all the bananas and whisk together with eggs, oil, yoghurt, milk and vanilla essence.
  4. Add sifted flour mixture gradually, mixing gently using spatula.
  5. Finally add walnuts and mix well.
  6. Pour batter in a greased and dusted bread mould. 
  7. Bake at 200 degree celcius for 40-45 min. or till a toothpick inserted comes out clean.
Note:
  • Use overripe bananas for better results.
  • Sprinkle little flour on walnuts to avoid them from turning black and sinking down while baking.